User Guide
How to insert tables on a page
Tables can be inserted in the Content perspective of a page. Click Insert and then click Table.
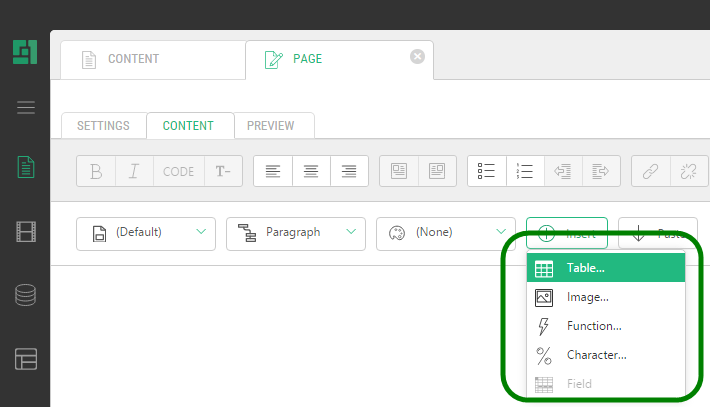
Figure 38: Inserting a table
How to insert a table on a page:
- Click Insert from the menu and click Table.
- Specify how many columns and rows you want the table to have.
Figure 39: Specifying the number of columns and rows in a table
- Click OK.

The table is now inserted on the page.
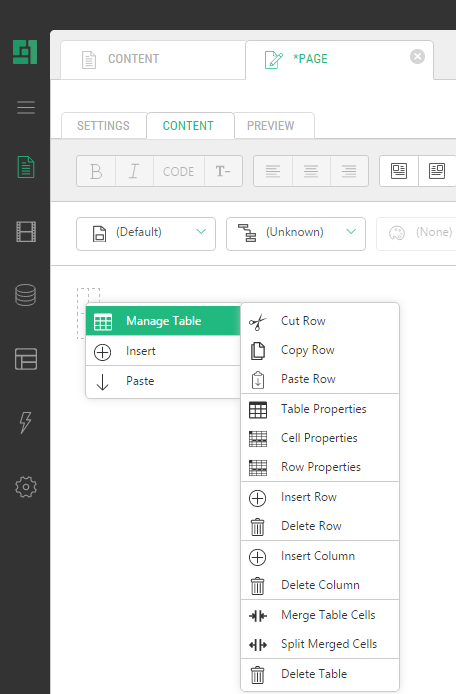
To edit the table further, use its context menu:
- Place the cursor in the table and point to Manage Table in the context menu.
Figure 40: Managing a table
- Using this menu you can insert new columns, rows, split and merge cells and so on.
Note: If you want styling on your table, for example, the background color, borders, padding or background images, you should use table classes. See the next section for more information.
Tables can also be formatted with predefined CSS classes. Depending on the design, a solution can have various table classes. Table classes are used to secure a consistent design on tables throughout the entire website. If you want to use table classes on a table you have to mark the table and select a table class from the dropdown list. It will be only possible to select from the dropdown list, if table classes have been implemented in your solution.
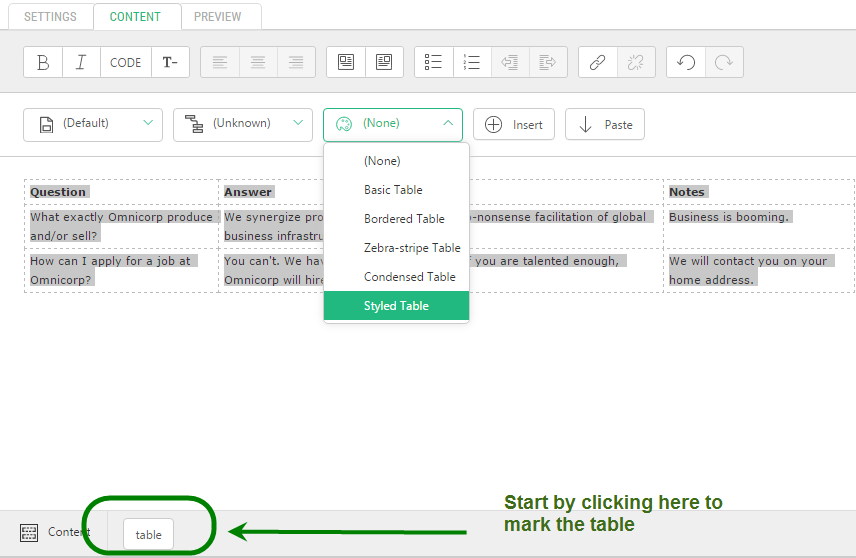
How to use table classes on your tables:
- Mark the table by placing the cursor in the table and then click the “table” element at the bottom of the editor.
- Select the table class you want to use from the dropdown list.
Figure 41: Formatting tables with style classes
- The selected table will hereafter be styled according to the selected class.
- Save and use the Preview tab to see the changes.