
User Guide
Multiple languages
Many websites have multiple languages. In C1 CMS each single page can contain multiple languages. This means that a single page can have several “dimensions or layers” depending on the number of languages in the actual solution. In the administrative console you will see only one language at a time. In the lower right corner of the CMS Console, you can switch between different languages.
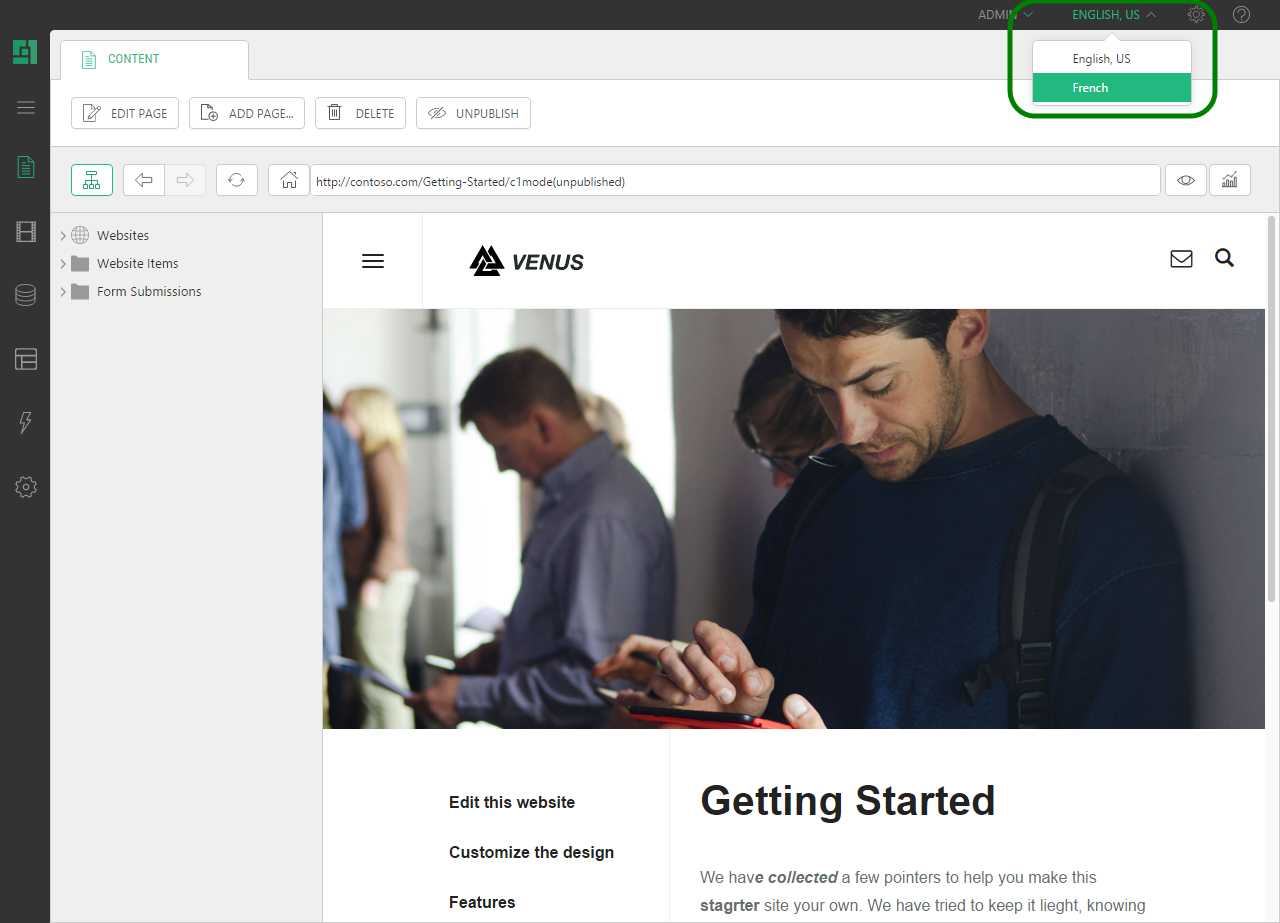
Figure 60: If your website is localized, you can switch between the localized languages
Editors can localize back and forth between different languages, and it is of no importance from within which language the page originally was created. There is no need for a master language and as an editor (depending on your security permissions) you can decide exactly where you want to translate content, and which language you want to translate the content from.
By default, C1 CMS comes with one website language only - English. Hence, there is no language switching menu for the website in the CMS Console. It only appears if there are at least two languages added to the website.
To add another language:
- From the System perspective, select Languages.
- Click Add Language on the toolbar.
- In the Add Language window, select a language in the Languages list. (Hint: Start typing the first few letters of the language and the list will be reduced to the names of languages containing these letters.)
- If necessary, overwrite the URL mapping name and / or disable access to the language to all users. (By default, the system provides the name for you and enables the access.)
- Click OK.
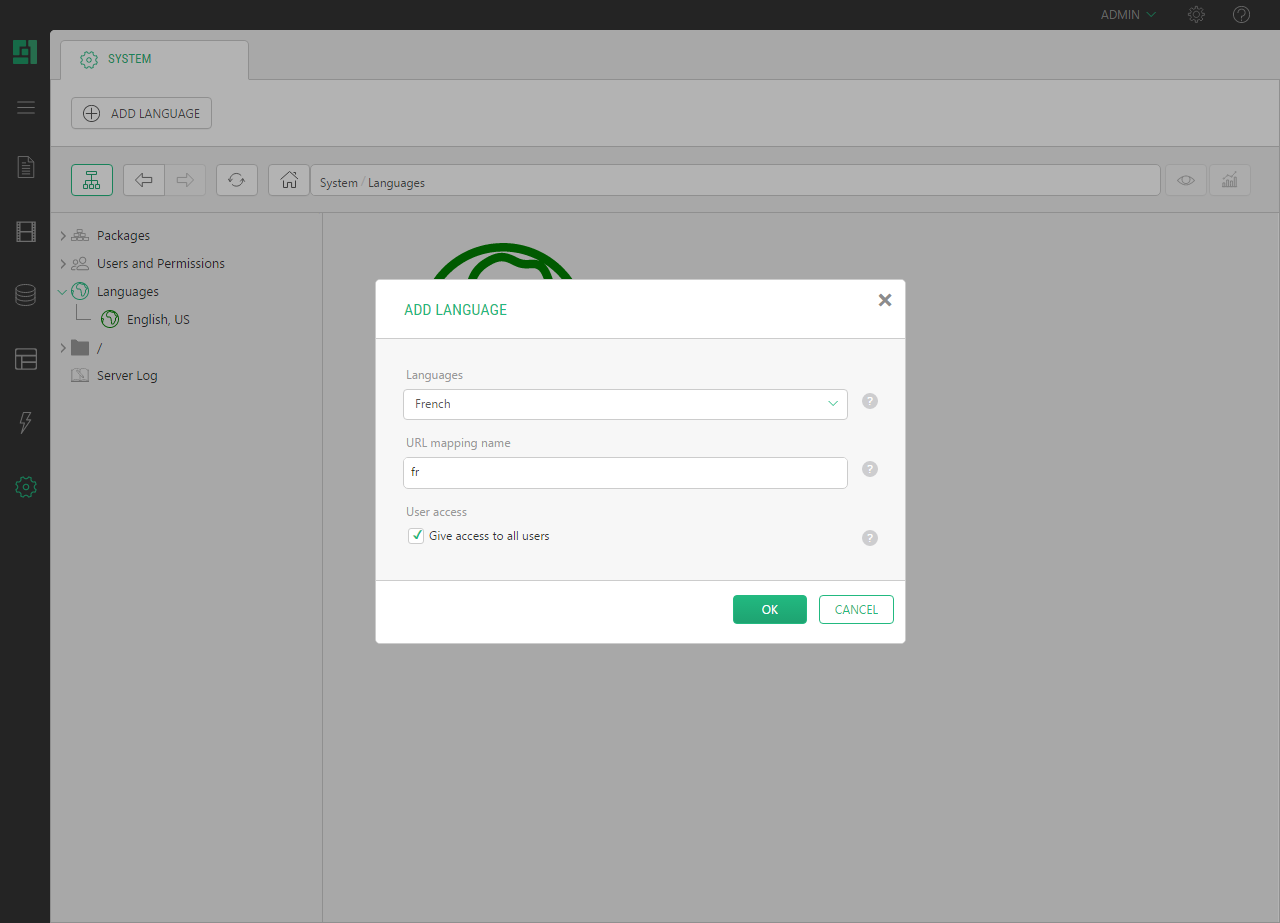
Figure 61: Adding languages
The language will appear below the Languages.
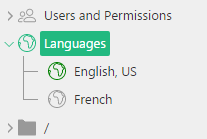
Figure 62: The languages added
You can add as many languages as you like.
The tree structures will be identical in different localized versions to start with. You can always decide to add new pages to single localizations and this way the tree structures will differentiate between the different localizations. The content of the pages has to be translated manually and, until a page has been translated, the pages will be marked with another type of an icon. How to translate pages will be described in the following sections.
How to switch between languages:
- Select the language you want to see from the menu in the top right corner.
Figure 63: Selecting the language of the website
- In the popup window, click the “OK” button. All unsaved content will be saved and you will be forwarded to the language you have selected.
Figure 64: A warning when changing the language
- All pages are now showed with another type of an icon. This icon indicates that the pages have not been translated yet.
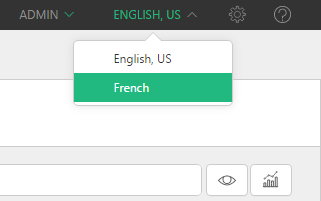
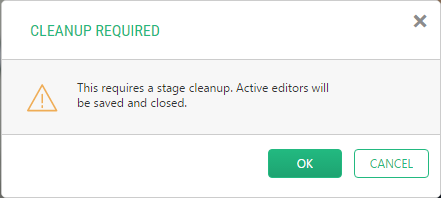

Figure 65: A website not translated yet
A page will first exist on the localized website after the page has been translated.
How to translate a page:
- Select the page you want to translate.
Figure 66: Translating pages
- The Translate button will now appear in the toolbar.
- Click on the Translate button and the page will be translated. After this you can translate the content on the page manually.

After the page has been translated, the icons will change back to their normal appearance.
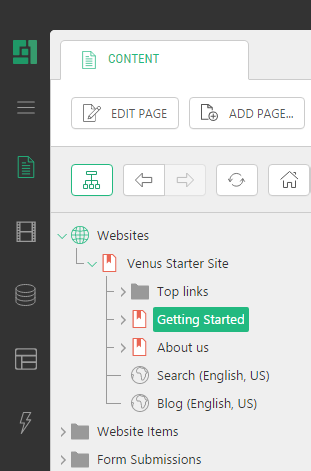
Figure 67: The page has been translated
Note: Translation should always start from the top of the tree structures. If you mark a child page whose parent page has not yet been translated, the Translate button will not be available in the toolbar.
You can select which language should be the language to translate from. This means that all localized pages will be translated from this language version. If English is selected as the language to translate from, then all other localized languages will give you the English pages when you choose to translate to a new language. You can change this setting whenever you like to translate from another language or does not want to see other localizations at all. The setting is user-based, so your personal setting does not affect that of others.
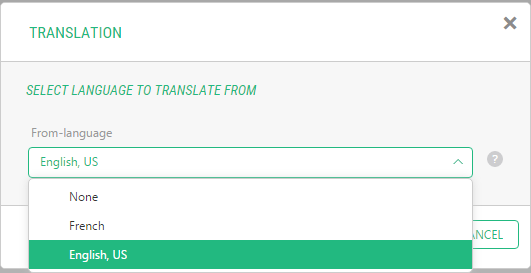
Select which language to translate from:
- The translation settings are placed under View in the top menu.
- Select “Translation…” and a popup box will appear.
Figure 68: Selecting the language to translate from (1)
- Select the language to translate from, from the dropdown list. Click the OK button and the selected language will now function as the language all other localized versions will be translated from.
Figure 69: Selecting the language to translate from (2)
- You can always change which language you want to translate from or you can choose not to use translation by selecting “None” from the dropdown list.

When you delete a page that has been translated you will only delete its localized version. This means that if you delete a page that has been translated from another language, the localized page will be deleted and the Globe icon will be now shown next to the page in the Content perspective. After this, you can always choose to translate the page again if needed. The original page will remain until you delete its last localization.
It will never affect pages on other languages if you choose to delete a page on any localization.